If you are just starting out in metalworking, you should definitely check out vertical bed mills. These machines are extremely rigid and offer precision and versatility for any job you throw at it. In this guide, we will go over the vertical bed mill basics so you can confidently operate this machine safely and effectively.
What Is a Vertical Bed Mill?
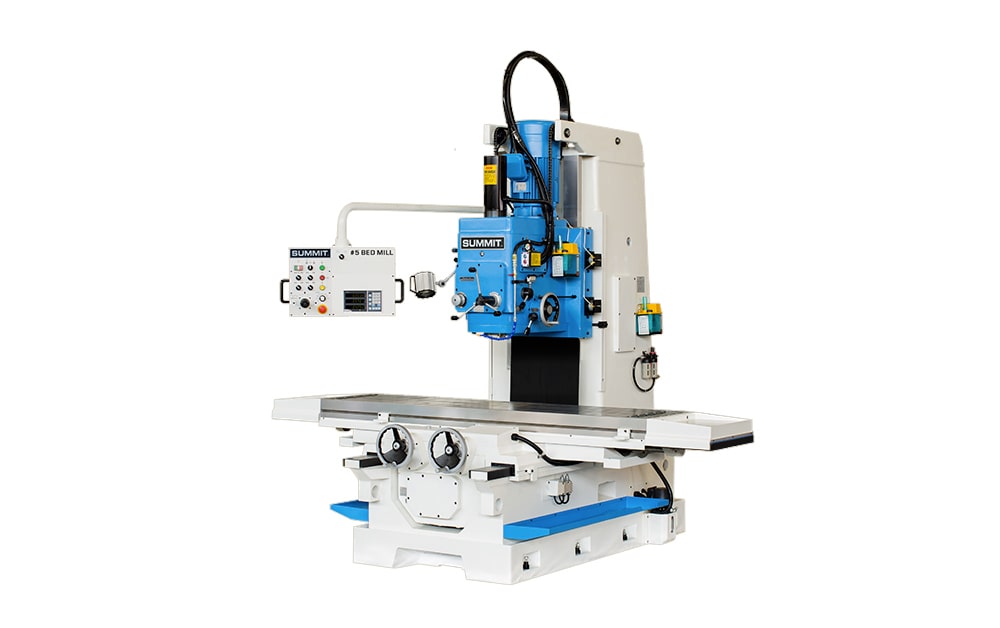
A vertical bed mill is distinguished by its “bed”. The bed is the sturdy, fixed base that supports the table and provides exceptional stability. This allows you to make heavier cuts and support larger workpieces and the vertical spindle allows for easy access to the workpiece from above, simplifying tool changes and setups. This setup makes it ideal for shops doing general metalworking, where you need reliability without the complexity of multi-axis CNC setups right out of the gate. Vertical bed mills work great for operations like face milling, drilling, slotting, and angel cuts. They are used in industries such as automotive repair, gunsmithing, and small-scale manufacturing. These are great machines to have in your shop especially if you’re just starting out.
What Sets a Vertical Bed Mill Apart From Other Mills?
What makes a vertical bed mill different from other mills is the combination of the fixed bed and vertical orientation. The bed absorbs the shock from heavy cuts, reducing chatter and improving surface finishes, while the vertical spindle lets you plunge straight down for drilling or bore holes with pinpoint accuracy. Sizes vary widely, from compact benchtop models with tables around 18×6 inches to industrial machines with 40×16-inch tables or larger. No matter your scale, these machines are built to last, often featuring cast-iron construction for damping vibrations and ensuring parts come out smooth and to spec.
The versatility of vertical bed mills allows them to shape flat surfaces, create pockets, and profile edges. They can be used for aluminum prototypes or steel brackets and can handle everything from soft plastics to tough alloys.
Vertical Bed Mill Basics: Understanding the Key Components
Now that we’ve covered what is a vertical bed mill, let’s look at the vertical bed mill basics. Knowing your machine inside and out is the first step to a safe, efficient operation. Like any milling machine, a vertical bed mill has several core parts that work together to deliver precise cuts.
Motor: At the center of the machine, the motor powers the spindle’s rotation. It drives the cutting tool at variable speeds, often through a belt or gear system.
Head: This houses the spindle assembly and controls. The head can often be swiveled or tilted for angled cuts, giving you flexibility without repositioning the entire workpiece.
Spindle: The spindle is the rotating shaft that grips your cutting tool using a tool holder. In a vertical bed mill, it’s mounted vertically, allowing downward plunges for drilling or end milling. A high-quality spindle with tapered bearings will prevent wobbling that ruins finishes.
Quill: Surrounding the spindle inside the head, the quill provides fine vertical movement (Z-axis travel) for boring or pocket milling. Most models offer 3-5 inches of quill travel.
Quill Feed Handle: Attached to the head, this lever lets you manually control the quill’s descent. It’s smooth and precise, ideal for hand-feeding tools during delicate operations like engraving.
Table: The workhorse of the mill, the bed-style table is a heavy, flat surface where you clamp your workpiece or vise. It moves in the X and Y-axes via handwheels, with T-slots for secure fixturing. There is 20-40 inches of travel depending on the model which is enough room for parts up to several feet long.
Saddle and Cross Slide: Mounted on the table, the saddle handles Y-axis movement, while the cross slide handles X-axis movement. Together, they let you position the workpiece directly under the spindle.
Column: This is the vertical pillar rising from the bed. It supports the head and knee (if present). In bed mills, it’s extra rigid to handle side loads from heavy milling without flexing.
Base: The foundation of it all, the base is a massive cast-iron slab that anchors the machine to the floor. It absorbs vibrations and keeps everything level, ensuring accurate cuts.
Knee (on some models): While true bed mills fix the table to the bed for stability, many vertical bed mills include a knee for added Z-axis adjustment. It raises or lowers the table using a hand crank.
These components are engineered to work together. For instance, the fixed bed reduces deflection under load, meaning less chatter and longer tool life. As you explore vertical bed mill basics, remember quality matters.
How to Operate a Vertical Bed Mill: Step-by-Step for Beginners
Learning how to operate a vertical bed mill starts with the steps outlined here. Whether you’re facing a block of aluminum or drilling a series of holes, following these steps will build confidence and help prevent mistakes. These steps are for a manual vertical bed mill. Always consult your machine’s manual for model-specific instructions.
Preparation and Setup
Power Up and Warm-Up: After plugging in and turning on the mill, run the spindle at low RPM for 5-10 minutes to distribute oil and check for unusual noises.
Secure the Workpiece: Clamp your workpiece to the table using a vise or clamps in the T-slots. Use parallels or shims for flatness, and double-check with a dial indicator that it’s square to the spindle. For odd shapes, consider a rotary table attachment.
Select and Install the Tool: Choose the right end mill, drill, or face mill based on your operation and workpiece. Insert the tool into the collet, tighten with a drawbar, and verify that there is no play by hand-rotating the spindle.
Set Speeds and Feeds: Dial in RPM using the head’s controls. Calculate feeds based on chipload and start slow to avoid breaking tools.
Basic Operations
Face Milling: Lock the quill, engage the table feed, and sweep the face mill across the surface of the workpiece to smooth out roughness.
End Milling Slots or Pockets: Use the quill to plunge the end mill down, then move the table in X and Y-axes for contours. Retract fully between passes and use coolant to clear chips so there’s no build-up.
Drilling: Center the drill under the spindle, lower the quill slowly, and peck-drill to clear out any chips. For precision holes, follow with a reamer tool.
Boring: Start with a drill, then swap to a boring head for exact diameters.
Slotting and Keyway Cutting: Using slitting saws for precise grooves that fit keys or hold fasteners.
Finishing and Shutdown
Inspect Your Work: Measure with calipers or micrometers. Deburr edges with a chamfer mill if needed.
Clean and Lubricate: Wipe down the table and taper with a lint-free cloth. Do not use compressed air as it pushes debris into the bearings. Apply way oil to the slides and check spindle lube levels.
Power Down Safely: Stop the spindle, lower the head if raised, and unplug. Cover the machine to prevent the mill from getting dusty or dirty.
The Future of Milling Machines: What’s Next for Vertical Bed Mills
As we look towards the future of milling machines, vertical bed mills aren’t going anywhere. As technology advances, including CNC integration, so do vertical bed mills. Today’s hybrids blend manual beds with digital controls, using G-code for automated paths. Imagine programming a pocket mill sequence on software like Fusion 360, then letting the machine run unattended. Advancements in spindles promise even better high-speed units and sensors for real-time vibration monitoring.
There you have it, a complete beginner’s guide to milling operations on vertical bed mills, from vertical bed mill basics to the future of milling machines. You’ve learned what a vertical bed mill is, the various parts and how they work, and how to operate a vertical bed mill. As you move forward with your own milling operations, feel free to contact the knowledgeable staff at Summit and we can help you find the right vertical bed mill for your shop.